|
Main
Menu:
|
|
|
|
Combat Information Center
|
|
|
Training Lecture #1: The Maze |
|
|
"Good morning, beings," Moose said as he looked over the class of raw trainees arrayed before him in the small auditorium. "My name is Captain Lewis Gregory, also known as 'Moose', and I'm Wolfshead Squadrons Operations Officer, where I fly B-Wing fighters. |
| I've
been brought back in here briefly to go over with you the first step
of your training as Alliance starfighter pilots...the Pilot Proving
Ground, better known as the Maze."
"I'm sure you're all wondering why you've got to go through this drudgery," Moose continued, beginning to pace back and forth a little. "I'm sure you're all anxious to leap into a starfighter, go out there, and start doing your part for the Alliance. But you must remember that fighters are expensive and rare, and so are their pilots. We can't send you out until we're sure that you can make the grade. The Maze is the first leg of that assurance; it shows the instructors that you have basic command of the maneuvering, weapons, and defensive systems of your starfighter, and thus have a good shot at completing the second phase of training, the Historical Missions. Many Alliance squadrons require the completion of 8 levels of the Maze in some or all starfighters." |
|
| He
turned to show the class the four Flight Badges on his rarely-worn dress
uniform. "These right here are what you're aiming for." Moose
began keying input into the instructor's datapad built into the console,
and images of the Maze began to appear on the holoscreen behind him.
"Enough about the whys, let's get down to business...."
"The Maze is basically an obstacle course. It consists of a series of thirty-seven platforms arrayed in a twisting, turning line in space. On thirty-six of the platforms are three gates, each somewhat bigger than a starfighter. (The thirty-seventh platform is the start/finish line and only has one gate.) Some gates are short, some gates are tall, and some are tall but have a wall that cuts off the bottom portion. Your object is to fly your fighter through all 109 gates, missing none, in a given amount of time. You don't want to miss a gate because each gate that you miss deducts a 15-second penalty from your time remaining. When the clock on your instrument panel reaches 0:00, it's game over." "Now, in order to make this more interesting, sometimes platforms will be defended by these small gray objects that look like laser turrets. That's because they *are* laser turrets. In the early levels, there will be few of them, and not all of those will fire back. But by the time you get to the toughest levels, levels 7 and 8, each gate will have two emplacements, and they will *all* be shooting back at you." Moose paused a second to let this sink in as the class murmured. "But, there's a good side to it. Each of the emplacements that you destroy adds 2 seconds to your time remaining. In fact, some levels can only be completed by destroying targets, because the time allotted is simply too little for a slower fighter to make it through. If you are a good shot and destroy lots of targets, you will add enough time to the clock to be able to complete the level." "I'm going to give you some general information now on each of the levels of the Maze, so pay attention..." |
|
LEVEL 1: If you can't get through this one after a couple of tries, it's time to consider a career in the infantry. You have 8 minutes 30 seconds to complete the level, which is more than enough time for even a Y-Wing or B-Wing. There are very few targets (only about 25% of the platforms will have them and usually there will only be one or two) and very few of those will fire back. |
|
LEVEL 2: You *might* have to work at this one. There are more targets--most platforms will now have at least one--but very few will shoot back. You have 6:00 to complete the level. Pay attention to the last three platforms on the level--each will be fully populated with six targets, and the second of the three will have all six targets firing at you. Get used to it. |
|
LEVEL 3: Your time is cut to 4:30. Each platform will now have one or two (maybe more) targets, and they will begin to fire back with increasing frequency. Slower fighters like Y-Wings or B-Wings will have to destroy targets in order to complete this level in time. Watch the last three platforms again--this time, the first and third ones will open up on you. |
|
LEVEL 4: Sometimes called the "duck shoot". You only have 3:00 on the clock, but all platforms have a full complement of six targets. Even fast A-Wings will have to shoot targets and add time to the clock to get through this one. Not many of the targets will shoot back, but remember, this is controlled on a platform level. Either all the targets on a platform will shoot at you, or none will. Again, beware the last three platforms, as all will be giving you a warm greeting before the finish line. |
|
LEVEL 5: You have more time (5:30) and fewer targets (one to four per platform), but from here on out *all* the emplacements will shoot back at you. If your shields get too low, you may have to find a safe spot to pull off and recharge, provided you have time. (More detail on tactics in a minute.) |
|
LEVEL 6: Basically the same as level 5, except there are slightly more targets. As with level 5, they're all active and firing. In addition, you only have 5:00 to get through the level. |
|
LEVEL 7: This is the nastiest level. Each platform has a full complement of six targets and they're all gunning for you. This is the full test of your basic maneuvering, evasion abilities, systems management and long-range gunnery. You have 5:00. |
|
LEVEL 8: Basically the same setup as level 7, except now some of the platforms are set up to fire to the rear. They will only shoot at you from *behind* as you fly past them, so now you have to worry about your rear shields as well. You can recognize these platforms by their slightly different coloration. You have 4:30 to finish the level, and when you do, you will earn your Flight Badge for that particular starfighter. |
|
LEVELS 9+: Not many people push up past level 8 in the Maze, but some squads (Gold, for example) require completion of levels 9 or 10 for entry. The layout remains roughly the same as for level 8, but the emplacements become progressively more accurate and their range increases. Completion of the Maze at level 10 or beyond in any fighter is grounds for great pride indeed. |
|
Moose turned back to the class. "So basically, all you have to do is fly a fighter through hundreds of small openings while being shot at and shooting back. It's easy, we do it all the time." The class chuckled nervously. "OK, on to general tactics, and then some specific suggested tactics for each of the starfighters. These are just suggestions. All of you may actually find a way of doing something that works better for you, and that's fine. But here's what's worked for me and some others in the past..." |
GENERAL TACTICS- Don't miss gates. 15 seconds is not a time penalty easily made up at any level. Flying through gates should be your priority, even above shooting at targets. If you do miss a gate, it's your call as to whether you want to try and turn around to go back through it (and risk disorienting yourself completely), or just head forward and take your medicine. The :15 penalty is not assessed until you go through the *next* gate in sequence. You can always tell if you missed a gate on a given platform, because when you hit all three gates on a platform, the gates on the next platform change color (signifying that that's where you need to go next). If they don't after you've cleared a platform, you missed a gate back there. - You don't have to fly precisely through a gate in order to score it. You can clip the side or top of a gate, as they are not solid objects, and you will be given credit. This can help you cut down on maneuvering and line up your passes better. However, if you like to fly from an external view, note that the game seems to count the cockpit as the entire fighter in this case. If you drag the big S-foil of a B-Wing through the top of a gate, it doesn't seem to count. Try to fly the nose of your fighter through the gate just to be sure. This has an interesting side effect--films will often show the S-foil of a B-Wing dragging through the platform below it on a close pass. This is normal, just worry about putting the nose of your fighter through the gates and avoid hitting the platform. - The platforms, and the bottom walls on some gates, *are* considered solid objects and will stop your fighter cold if you hit them. Needless to say, this is not a good thing if you are being shot at. Oddly enough, however, lasers will pass right through them, so it's possible to be shot by a target on the other side of a wall. It's also possible for you to shoot targets on the other side of a wall, and in fact, this is the recommended way of dealing with those pesky level 8 rear-firing targets. Shoot the exposed ones on the second gate on the way in, then fire some blind shots through the walls of the first and third gates on the platform. You'll be surprised how good you'll get at hitting those emplacements. - Shoot targets from as far away as possible. The emplacements do not fire until you are quite close, and then an entire platform's worth will open up simultaneously. You have to work on your long-range sniping and whittle them down as much as possible. This is especially important on levels 7 and 8. Don't wait for them to open fire before shooting back; line your shots up, fire, and go on to the next one (much like mineracing). It's important for your survival that you whittle the firepower down on a platform as much as possible before it shoots at you; six lasers can make a mess of your shields fast. - Don't try to target an emplacement, your targeting system is disabled and replaced by the score display. Just line it up and shoot. - Utilize the relative calm of the first few levels to charge up your shields for the tougher levels 5-8. A typical good setup for levels 1-3 is to set your laser recharge rate to one notch above normal, leave your shield recharge at normal, press the ( ' ) key until you've transferred all power to the shields to beef them up, then let the lasers slowly recharge. You use the lasers so little in levels 1 and 2 (if you're a good shot, anyway) that they'll have time to come back. If you keep having to drain the lasers to get hits on targets, go ahead and set your laser recharge to maximum. Keep dumping power to the shields until they're fully charged. Real hotshots sometimes come through with the shield recharge rate set one notch below normal, to boost speed, but I never liked that personally. If you're feeling especially confident, or are short on time and need extra speed, set your ELS to 100/0 and transfer laser power to the shields every so often to keep them up. - Charge *both* front and rear shields early on, then set your shields forward. You won't be hit in the rear shields until level 8, but in an emergency, you can rebalance the shields and then set them full forward again and use the rear shields as a sort of emergency store of shield power. - One laser hit kills an emplacement, even if the laser isn't supercharged, so don't worry if keeping your shields beefed up leaves your lasers kind of wimpy. They'll still work. - Use dual-linked lasers (not quad-linked) on the X-Wing, dual on the A-Wing, tri-linked on the B-Wing, but single lasers on the Y-Wing. The Y-Wing is accurate enough that single lasers will work; the others are not. - I haven't found the ion cannons on Y-Wings and B-Wings to be very useful in the Maze. They move quite slowly, and by the time you are in range of an emplacement and have hit it with an ion blast, the emplacement has usually hit you. Stick with lasers. - Keep your shields up to full power as you get hit. Don't wait, let them get low, and then make a big power move that drains your lasers. I will hit ( ' ) immediately after being hit if possible. - If you're in a bad way, find a place to stop--either far away from a platform or underneath a platform, which is perfectly safe--set all recharge rates to maximum, and replenish your energy. Yes, it will cost you time, but if you have time to spare, it's better than dying. Just be sure you're not in firing range of any emplacements when you stop! - If you're hurting at the end of a level, clear the last platform and stop *before* you go through the last gate on the last platform (the one that sits by itself). Take as much time as you need to fully recharge your systems--set your recharge rates to maximum and boost your shields and lasers back up (make sure to speed this up by transferring laser power to shields often) and then set your recharge rates back to your preferred settings, throttle up, and fly through the last gate. - Jink and weave on your way in to avoid being hit if you can, but remember, your primary goal AT ALL TIMES is to successfully get through gates. |
|
X-WING |
||
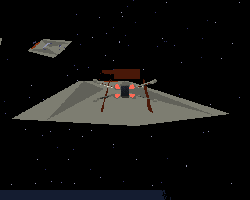 |
The X-Wing is only an average mazerunner, and it's because of its weaponry. The wide-set quad lasers provide impressive firepower, and their dispersion means that you're always going to hit a maneuvering target with something. | |
|
But they're not useful for the sort of precision long-range shooting you have to do here, and the odd cross linked setup when you select dual fire makes it worse. Still, it's got enough shielding to easily survive the pounding, good speed, and a crack gunner will still score lots of long-range hits. Remember that setting your ELS settings to 75/50 will give you a speed of 88 MGLT, more than enough to get through levels 1-3. When the going gets tough, go for 100/50 ELS and a speed of 75 MGLT, still enough to dodge a few long-range shots and make it through. If you're pressed for time, use ELS of 100/0 for 100 MGLT and transfer laser power to shields to keep them charged. Use lasers set to dual-fire only (single is too inaccurate and quad takes too long to recharge). |
||
|
A-WING |
||
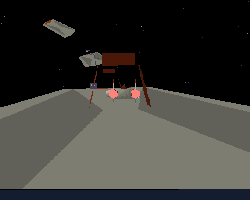 |
One would think that the speedy A-Wing would be King of the Maze, and, in the right hands, it is. Its only problems are light shielding and the time it takes to charge it. | |
| Always select dual-fire lasers and aim a pixel or two low on long-range shots. Be conservative--use ELS 100/50, which will give you 90 MGLT, which is plenty of speed for the Maze. Be careful if you decide to go full-out on the early levels and push speed to 120 MGLT or beyond; there are a few areas of the Maze where it's possible to get going too fast and miss gates. | ||
|
B-WING |
||
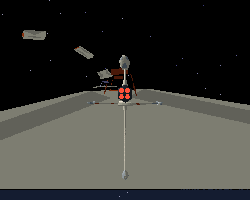 |
The B-Wing is the worst mazerunner of the four. It's the slowest with systems at ELS 100/50 (68 MGLT), its tri-lasers require 1/4 second longer to recharge than dual lasers and are poorly | |
| suited for precision shooting--or, for that matter, for point blank shots on the small emplacements (it is way too easy to "bracket" an emplacement with the three lasers if you aim a bit too high). However, the "head" mounted laser is a nice touch, and enables you to just put the center of the sight on the target and pull the trigger to virtually guarantee a hit. Use linked laser fire always and set ELS to 75/50 when possible; this gives you speed of 81 MGLT. | ||
|
Y-WING |
||
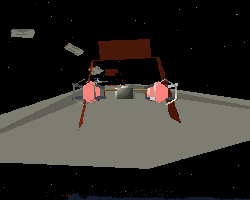 |
People are surprised when I say that the Y-Wing is a great mazerunner. Yes, it's big, and yes, it's slow, but it's also armed with two closely set nose mounted lasers that are | |
| fantastic for long-range precision shooting. This is the only fighter that doesn't require dual fire to be effective, but you might want to try aiming a pixel or two high on long-range shots. Also, the Y-Wing is less affected by changing ELS settings; ELS of 75/50 gives you 75 MGLT, but going on up to 100/50 only cuts it down to 70 MGLT. The Y-Wing typically scores the lowest numbers of points for 8 levels because it's the slowest (and thus gets the fewest end-of-level bonus points for time remaining), but it also always scores phenomenal laser hit percentages. Y-Wing mazerunners can often take out six emplacements with six shots before any emplacement gets a shot off. | ||
| "Now...I am downloading four films to your datapads," Moose turned back to the class. "They're part of this overall package, along with a transcript of this lecture. Each of the four films was taken in a different Alliance starfighter and in a different portion of the Maze, and should help illustrate both the particulars of a given level, and some of the particulars of handling each starfighter in the Maze. The films are: | ||||
|
||||
| "That's all, beings," Moose concluded. "Now get out there and begin your training, and may the Force be with you. I hope to see some of you in my unit someday, perhaps. Dismissed." |
|
Random Quote:
|
|
|
"Oh he's not dead, at least not yet." -- Obi Wan
|
Please read our Privacy Policy.
Last update of this page: 20/10/2001 - 16:37
